Questions to ask yourself:
How should I generally think about the Dry Deck system and its installation? {Answer}
Where can I see some Dry Deck Layouts and Sectional Sketches to understand the installation? {Answer}
Which direction should I run the ceiling panels? {Answer}
How are the gutters, downspouts and gutter mounting boards going to run? {Answer}
If there is a girder protruding down beneath the joists, such as in a cantilever supported deck, should I make 2 separate watertight ceilings or drop a supporting framework to make one continuous ceiling? {Answer}
American Dry Deck will fit any size or shape deck no matter how the framework is constructed. How do I figure what materials are required for the job? {Answer}
If I run into some weird or difficult configurations...what should I do? {Answer}
American Dry Deck
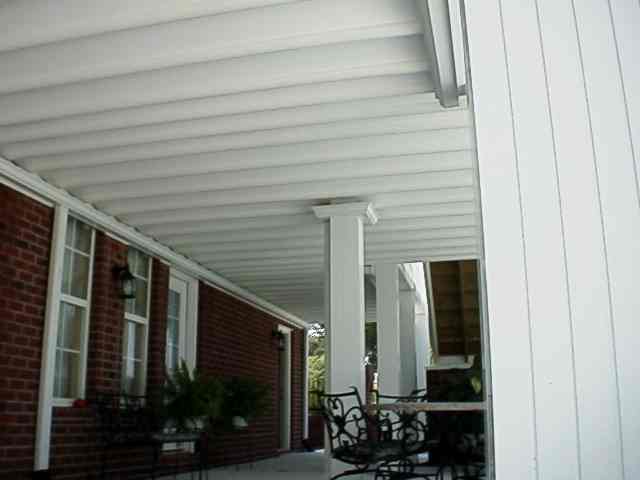
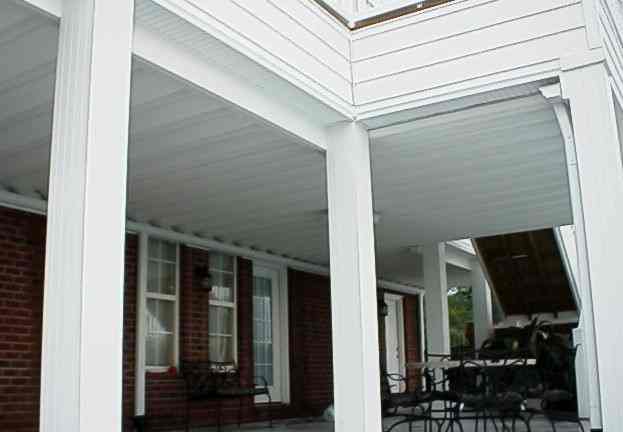
Think of the Dry Deck watertight ceiling system as a nothing more than a watertight drop ceiling system that can be suspended at any height. That is - it can fastened to any mounting plane you make - horizontal or tilted. But if you want to tilt it make sure you tilt it sufficiently so that no water will accumulate fast enough to overrun the high side of the pitch. A high-side flashing must be installed to flip the water onto the ceiling system. Remember, Dry Deck is engineered to handle level fastening which utilizes 2 gutters, 1 on the front and 1 on the back to catch the run-off from both ends. This is the standard method of installation which accounts for about 93% of all jobs.
Deck Layouts & Sketches
It is a priority to look at deck layouts and sectional sketches to really understand correct installation. Look them over and give us a call at Customer Service (888-416-7168). Send us a napkin sketch of your deck and we will make an installation layout for your job. We then create a Dry Deck materials list worksheet and send it back to you usually the same day. Click this link to take you to the Deck Layouts & Sectional Sketches web page.
Ceiling Direction
98% of house decks run the American Dry Deck Ceiling Panels from the wall out, normally the direction of the joists. Being that the American Dry Deck ceiling resides entirely below the bottom of the joists and fastened to furring strips, you can spin it around and orient it in any direction...just think about how to run your gutters...where you want to locate the downspouts...that's the main issue to the installation.
Gutters & Downspouts
You must have the final gutter plan in mind before installing the American Dry Deck ceiling system. Where is the water and debris to be carried off from the ceiling? Use as many 3"x 4" downspouts as possible to provide the best possible drainage. Also, all gutters must be removable! If you need to get access into the ceiling someday...say your wedding ring fell through the deck! or...you want to add a ceiling fan at a later date...be sure to use standard gutter hangers that use a screw. You must be able to lower one of the gutters enough to work with the "Cap Removal Tool" (pry bar) when un-snapping the locking Caps from the Stringers. Only one gutter is necessary to lower, usually about 2 feet is good, just enough to start the unsnap of the locking Cap and then peel it off all the way to the other end which is covered by the other gutter. There will be no problem during reinstall because the last half-foot of locking Cap will snap back in.
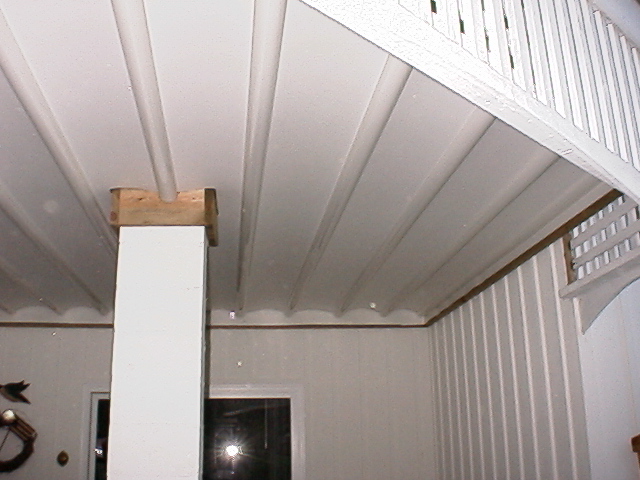
Girders & Cantilevers
You either make one continuous watertight ceiling or make two independent watertight ceilings. To make one continuous ceiling, you need to drop down a supporting framework of 2x4's and 1x4's creating a 2'x2' lightweight grid-work which will hang down and reside flush to the bottom of the girder. Now you have one continuous mounting plane to fasten the Dry Deck Stringers. Of, course, if you make two individual watertight sections, you'll need additional gutters and downspouts to handle that section.
Figure Out The Parts You Need
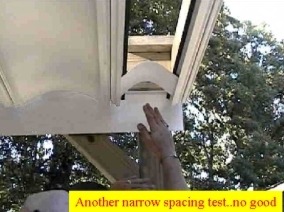
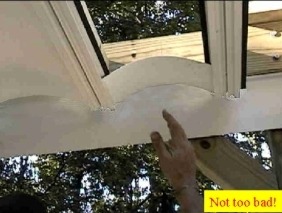
Measure your deck from underneath. With a normal residential installation, the length of the parts you will use will be determined from the house wall out to the inside of the support posts. The width is considered along the house wall. Take the width and divide by 16" to get the number of Ceiling Panels you will need. Remember, the Spacer Sticks hold the Dry Deck Stringers 16" apart. The Ceiling Panels are precut to fit these 16" o/c spaced Stringers. If the deck is a simple rectangle, you can start from one end and head toward the other end using the Spacer Sticks. Stop when you get to the last 3' and divide out this space as equally as possible, say 3- 12" spacings. This will make the ceiling panels overall spacings look good. Don't squeeze in a very small (less than 8") ceiling panel section at the end...it won't work properly. Example: say you have a 12x20 deck. You know you will use 12' parts, so how many Ceiling Panels will you need? A 20' deck is 240", divide by 16", that gives you 15 Ceiling Panels. Subtract 1 from this number and this is how many Main Stringers & Main Caps you will need. That is 14 Main Stringers and 14 Main Caps. You will always use 1 End Stringer & 1 End Cap at each end of the ceiling system unless you decide to just use the Main Cap (half-round look) instead of the 1/4 round look which the End Cap provides.
Splash Shields
Now, the Splash Shields. They are basically the flashing parts associated with the system. They fit on top of the 2x8 gutter mounting boards. They are only available in 12' lengths, so take your width measurement, double it, and divide by 12. Splash Shields go on both the front and the back of the ceiling system. That is why you double the width measurement if you have a simple rectangular deck. Use at least a 4" overlap when installing. **When ordering the American Dry Deck parts you need, remember everyone makes cutting mistakes, so be on the safe side and think about getting some extra parts. After you measure your deck and figure what American Dry Deck parts you need, call us and let us do it for you so you can compare your notes against ours. We will also make a Dry Deck layout for you with deck dimensions you give give us. THis will show you where to start and which panels we think you will need to trim down to fit the out tail end of the ceiling system. In other words, which Ceiling Panels you would trim down to fit the narrower spacings. We also will mark up where the 2x8 treated Gutter Mounting Boards (GMBs) reside against the house wall and along the supporting posts. The furring lumber is usually spaced 3-4' apart, but not too far, because we do not want the Stringers to bounce when you smack on the locking Caps with the rubber hammer. Remember, the Splash Shields attach to the GMBs, and make sure you have enough for some overlap. The furring strip layout is described as follows. The first and last rows (the outer rows) of furring lumber is fastened to the deck framework or drop-grid-work about 2 1/2" from the face of the GMB/Splash Shield. Then divide up the inner distance in between them and place the rows of furring strips. We like to use around a 2 1/2' to 3' spacing. See our Dry Deck layout gallery of sketches to see some pictures
Gutter Mounting Boards &Splash Shields
The first step is the installation of the 2x8 treated Gutter Mounting Boards (GMB) and the Dry Deck Splash Shields and any aluminum flashing that needs to be installed prior to the furring lumber. Much of the aluminum flashing can be installed after the furring lumber to provide angular pitch for water run and plenty of air spacing. We reccommend that all flashing be thought about carefully as to not hold any standing water and allows large amounts of air to freely circulate in and around all tight areas. Be sure to download the Brochure to see the quick steps of the Installation process from the home page of this site. You will also see some typical cross-sections. Use the 2x8's as GMBs against the house wall and along the outer deck supporting posts spanning between them (assuming this is the direction of the ceiling system you have chosen). The 2x8 GMBs use the Z Type Splash Shields. The Z Type Splash Shields have a soft flexible seal at the top of the part which seals against the house wall. This stops the water from getting behind the GMBs. If your wall surface is rough and non-uniform, use you caulk gun to apply Butyl "Gutter and Flashing" sealant behing the soft flange and pot the flange into it. The idea in using the American Dry Deck Ceiling System is to direct, or shall we say, flash all water from above and streaming down all walls onto the ceiling system or directly into the gutters. Do not let any water to get behind a GMB or a side wall Stringer. Flashing is the key and the key to sucess is to test your flashing work, use the garden hose to test your flashing integrity! All boards that attach to the house walls should be given consideration of how to flash the water onto the Dry Deck ceiling system to prevent water from above seeping behind the the boards and running down the wall. If you see a real difficult problem area where water can track behind your boards, we recommend using the butyl gutter and flashing sealant, urethane sealant or silicon sealant. These sealants form a very durable and pliable watertight seal that can expand & contract with temperature. Remember, sealant replaces a good flashing job. After installing the GMBs install the Splash Shields and any aluminum flashing. Use the 1/2" long magnetic stainless steel screws provided with your Dry Deck order or an aluminum white headed screws to fasten the Spplash Shields to the GMBs. The location of the screws is VERY IMPORTANT....put them In-Line with the ends of the Dry Deck Stringers...Hide Them...You do not want to see visible fasteners when looking through the ceiling panel archs at the end of the job! ** PLACE the screws about 1" down from the top of the 2x8 GMB directly into the face of the part. Always layout where you Stringers will be installed,mark off where to put the screws immediately. Remember, when you get near the end of the deck, you will have smaller spacings..and make them look good!
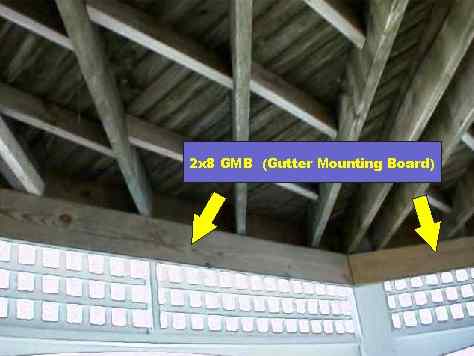 2x8 Gutter Mounting Boards at outer posts |
 GMBs & Splash Shields |
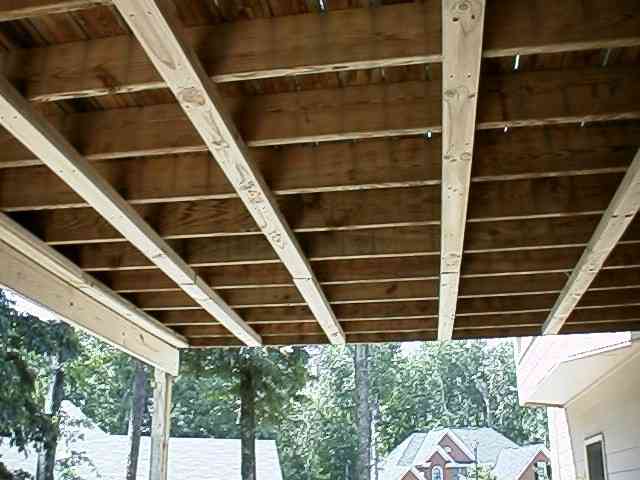
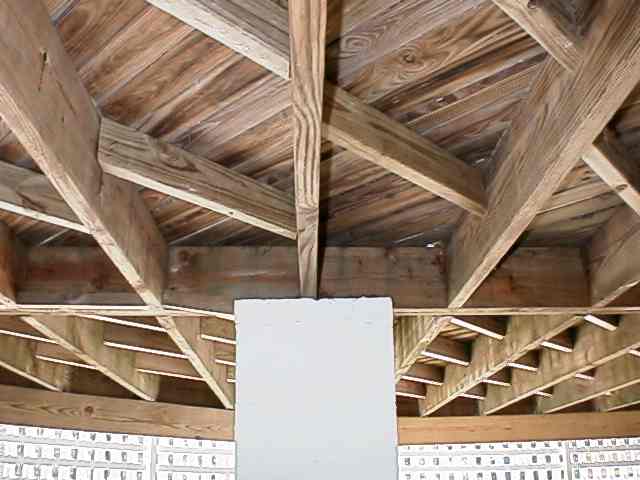
The second step is to run the treated furring strips. Rember, American Dry Deck is a watertight "drop" ceiling system. You establish a nuetral mounting plane using furring lumber. You can drop it down using 1x4s, 2x4s, or make alightweight grid framework out of 2x4s and 1x4s and hang it below the joists 1' down, 2' down, etc. These strips provide the surface to mount the Dry Deck Stringers. If your joists run parallel to the house, you can attach directly to the joists and not use the furring strips, but you will need to frame up in some places to properly support the ends of your Dry Deck Stringers. When you create the "drop" mounting plane, the Stringers can then be placed parallel to each other on a common plane. You will space them out using the Spacer Sticks. When you get close to the end, you will need to divide up the last 47" or less to create your narrower spacings. Just remember "Do Not" make any spacing less than 12" on center...that is from the center of a Stringer to the center of a Stringer. The Spacer Sticks place the Dry Deck Stringers 16" o/c apart. You will not usse Spacer Sticks for the narrower spacings. As mentioned above, attach the front and back rows (the outermost rows) to the underside of the deck's framework first, we usually place them 2.5" from the face of the Gutter Mounting Board. Then divide up the center area and run the other furring rows. Try not to exceed the 36" spacing recommendation. If you get the furring spacing too wide the Stringers may bounce when you smack on the Locking Caps. All furring striping should be butted end to end to make a continuous row.
|
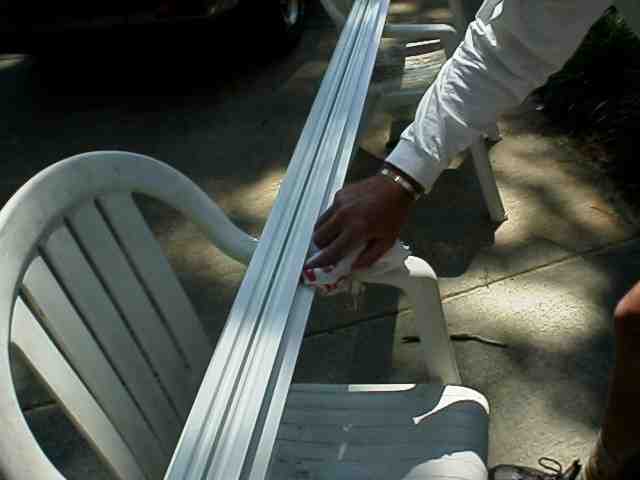
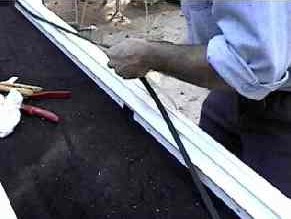
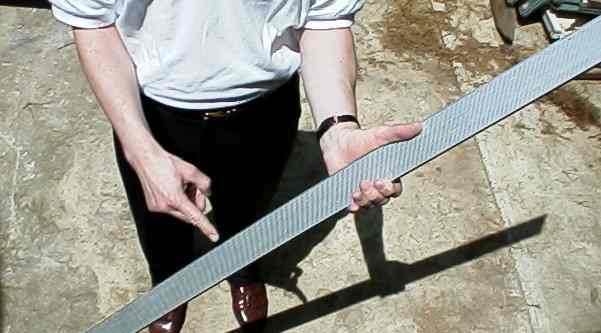
Apply the Cushion Strips to the Stringers. A time consuming job, but you have to do it. The Cushion Strips keep the American Dry Deck snap-lock system flexible but tight, more or less a shock absorber. The Main Stringers require two Cushion Strips and the End Stringers use one. Wipe off the surfaces where they stick at the outer edges with a touch of lacquer thinner on a clean rag before applying. If you need to splice strips together, try to bunch up the two butting ends squarely together, making a slight bulge. This tight fit is to prevent a gap due to shrinkage over time.
Wipe off Stringer |
 Apply Cushion Strips
 |
Stringer Mounting
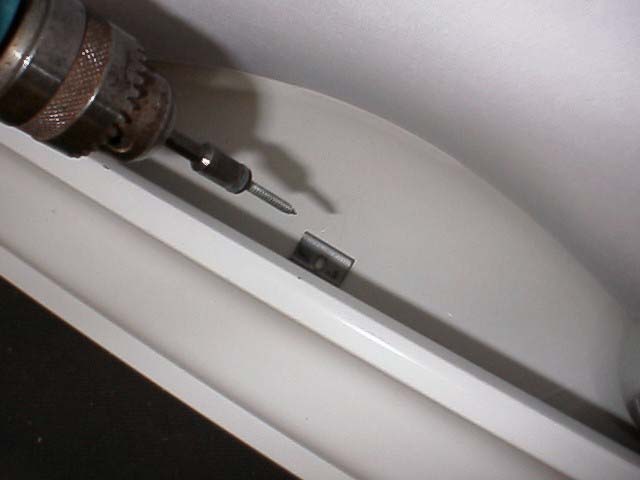
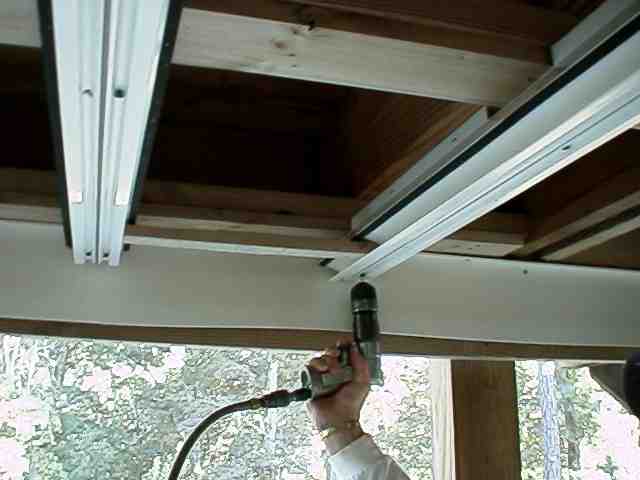
Next, the Stringers of the system are installed to the treated furring lumber (i.e. mounting plane). The Stringers are cut to length 1-1/2" short from each GMB. This means a total of 3" from the wall GMB to the outer GMB measurement. Now the question is where to begin with the first Stringer placement. If the deck is a simple rectangle, just begin at one end of the deck and "Spacer Stick yourself" to the other end. If you have inside and/or outside corners, read the "Inside and Outside Corners" section. See Installation Layouts to see alot of examples. **Make sure the first Stringer is "stringline straight" **very important**. Spacers sticks will progressively align all the Stringers to each other, but you will need to check your straightness every other Stringer. Use an orange piece of stringliine and hold up to the Stringer edge. This periodic check is very necessary just as always thinking to keep the Stringers flat to the furring and the Spacer Sticks square to the Stringers. Use 3" deck screws for fastening up through the bottom of the Stringers into the furring lumber. Always use an "Auto-feed" Screwdrill if possible. When working above your head and holding the Stringers in place, you want to be sure the screws go in straight and quick. take this reccomendation to heart! It will save you in the long run. At the end of each Stringer, make sure your deck screws are secure because this is where the initial rubber hammering occurs when installing the locking Caps...and is also where the pry bar (Cap removal tool) is used to unsnap the locking Caps from the Stringer during disassembly. **VERY IMPORTANT** The 3" deck screws will "distort" the plastic Stringers, spreading its center locking groove to wide which of course is what retains the Caps...so this would be no good.. run the screws up and then back them off if necessary until you see no more distortion in the Stringer locking groove, you definitely want a constant groove width. Sometimes it may appear the screws are too loose, thats OK. If the locking groove is spread too wide the Caps will not be secured properly.
Use Spacer Stick to set one Stringer to the next. Use 3" Deck screws to mount the Stringers to the furring strips. |
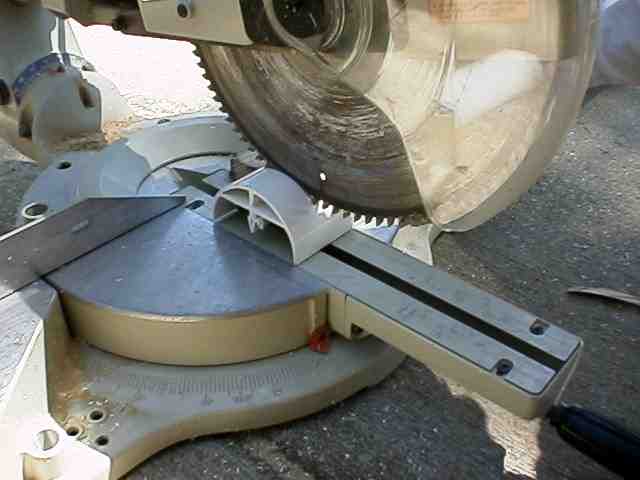
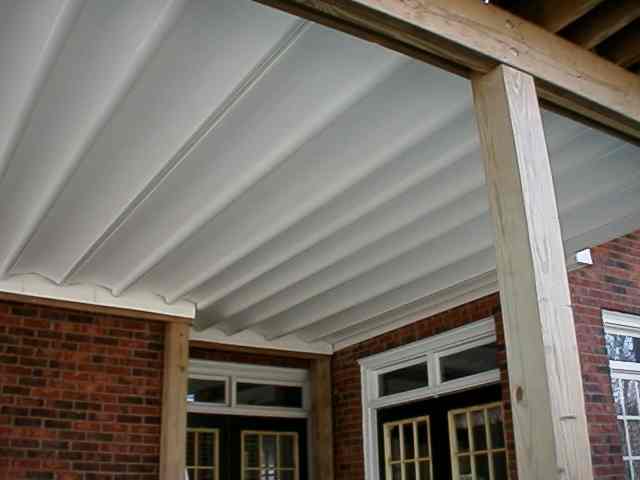
Next, install the precut width Ceiling Panels. The precut Ceiling Panels fit the equally spaced (16' o/c) Dry Deck Stringers that were installed using the Spacer Sticks, except for the non-16" spaced Stringers near the end of the deck that you created to make the Ceiling Panels look balanced. Cut the Ceiling Panels to length 1/2" longer than the Stringers. When installed, you will position the end of the Ceiling Panel 1/4" past the end of the Stringer. This is required to create a knife-edge in the ceiling system to help water shear off. Fit the Ceiling Panels into the Stringers by bowing them in the center. Put one long edge of the Ceiling Panel into one Stringer than bow the panel upwards and fit into the other adjacent Stringer. When you get to the end of the deck, you will have to cut the oddball width Ceiling Panels to fit your oddball Stringer spacings. Make test Ceiling Panel pieces about 6" wide to figure out the proper arch. The proper arch should look like the other panels. Transfer this oddball width to the Ceiling Panel to be cut. Cut a test panel to obtain width measurements. You MUST check EACH END and the MIDDLE to be sure your panel will have the proper arch all the way down the channels....**you do not want it to be flat anywhere! You should always order a spare Ceiling Panel just in case you make a mistake.
 Cut Test Pieces
 |
 Panel too wide
 |
 Looking good!...the crest of the arch is 1/2" below the bottom of
the joists
Looking good!...the crest of the arch is 1/2" below the bottom of
the joists |
Cut the locking Caps 3" short of the Stringers. Next, you will need to cut a bunch of Water Break parts that are used at each end of the locking Caps. To make these parts, cut off 1" wide pieces from some scrap length of Cap parts. Each Cap will use 2 Water Break parts, one at each end, leaving a 1/2" gap between the main section. Install the Cap 1-1/2"from the the end of the Stringer. Use a rubber or dead blow hammer to smack the Caps into the Stringers. **Be sure to swing or hit directly upwards so the Cap does not slide one way or the other. Its best to squeeze the Cap into the Stringer by the palm of your hand at each end to secure the location. After the long sections of the Cap are installed, snap in the Water Break parts at each end by hand. You should have about a 1/2" gap between the Water Break part and the long section Cap. This leaves a 1/4" space from the edge of the Ceiling Panel. Be sure you have the 1/4" knife-edge of Ceiling Panel edge visible.
 Make 1" wide Water Break parts |
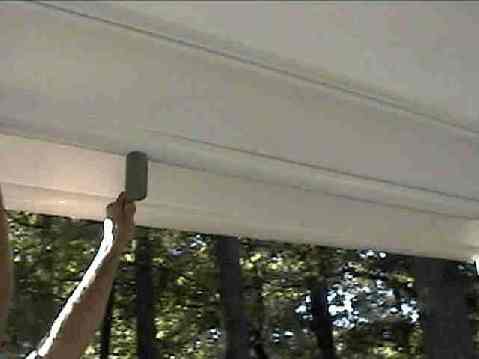 Install the Caps |
Inside and Outside corners are where it all begins. The first Main stringers to be place exist along the walls from these corners. After the wall Stringer is set, then adjacent Sringers will run off form both sides using the Spacer Sticks. If you involved in a deck section that spans between two corners, set the two wall Stringers and then fill in between with spaced Stingers. If you have any questions and would like for us to draw the Stringer layout to assist you in how we would place the initial governing Stringers, just give us call and send in your sketch. We'll draw on top of your sketch and send it back. A picture is definitely worth a thousand words.
 I & O Corners |
Corners & Angles |
Interior Columns
The interior column is handled by notching the two adjacent Ceiling Panels around the column. Install GMBs around the column. Be sure to radius the sharp notch cutout corners to avoid splitting the panel. Run the Dry Deck Stringers directly into the center of the column from both the front and the back. The gutter around the column can be either active (carrying away water via a downspout) or passive (just using it to mount gutters that will not get water..just for the crown molding look). If it is active, water will come off the notched Ceiling Panels and drop into the gutter just as normal. If it is passive, the area above must be kept dry.This takes considerably more work, but is the only method if you need to avoid a downspout along the column. To dry in the above joist spacings spanning the column, Dry Deck offers a 36" wide vinyl sheeting, a 1/16' thick Column Shield, running the length of the deck (from the house wall outward) to be used as the "dry in" flashing material. You could just as easily use a one piece long aluminum sheeting 36" wide. You normally will have to cut loose some toe nails with the reciprocatiing saw to free the column from the deck framework. Jack up the deck about an 1" to slide in the flashing (Column Shield part). Center it up to the joist spacings and lower the jack. Attach the flashing shield to the bottom of the furring strip lumber in a very loose fitting manner away from column using the stainless steel Splash Shield screws. The sheeting will buckle enough to conform itself to the height offset between top of the column and the bottom of furring strip lumber. Continue installing the Dry Deck Stringers as normal. Everything is the same except you will not have water in the two Ceiling Panels that run over top of the column.
 Joists running into center of column |
 Column w/GMB, Splash Shields needed |
 "Active" Gutter around Column |
Ceiling Fans, Porch Swings
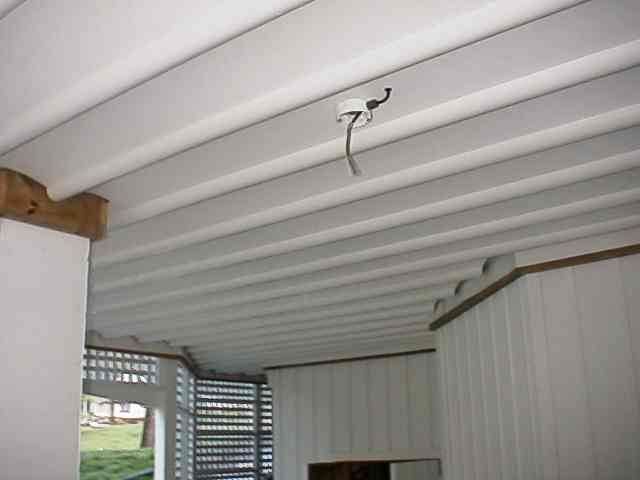
For supporting the vertical load of a ceiling fan or porch swing, a 4x4 blocking is lag bolted between adjacent joists. Keep the bottom of the 4x4 support block flush with the bottom of the furring lumber strips or joists. Holding the drill vertically straight, use a long 3/16" drill bit to make a pilot hole through the top of the crest of the arched ceiling panel and continue drilling into the 4x4 almost all the way through. Then use a 9/16" hole saw to cutout the ceiling panel for the insertion of the rubber grommet provided in the Ceiling Fan Kit (PN 1759). For Porch Swings, etc. just order the rubber grommets and the 5/16" eyebolts. Use a pliable sealant on the threads of the lag bolt to prevent damaging the rubber grommet during insertion. This will also keep a skim coat of sealant between the shaft of the lag bolt and the grommet. Screw in the Ceiling Fan Mounting Box that comes with the kit up through the Ceiling Panel and into the 4x4 blocking. To run elctricity, cut another 9/16" grommet hole in the Ceiling Panel about 5" away directly in line with the first grommet. Within the Ceiling Fan Kit comes 3' of round 16/3 wire to run through this grommet into the ceiling fan mounting box. Make sure to use a lubricant on the wire to make it slick as so it can be easily pulled through the rubber grommet and then back into the power supply junction box that should be located just above attached to the joist.
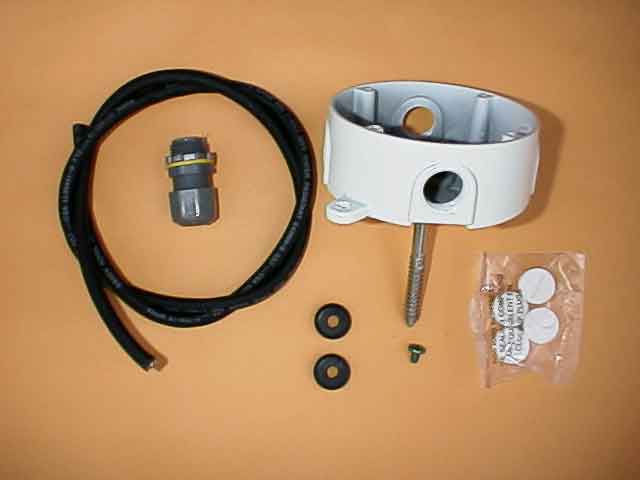 Fan Mounting Kit |
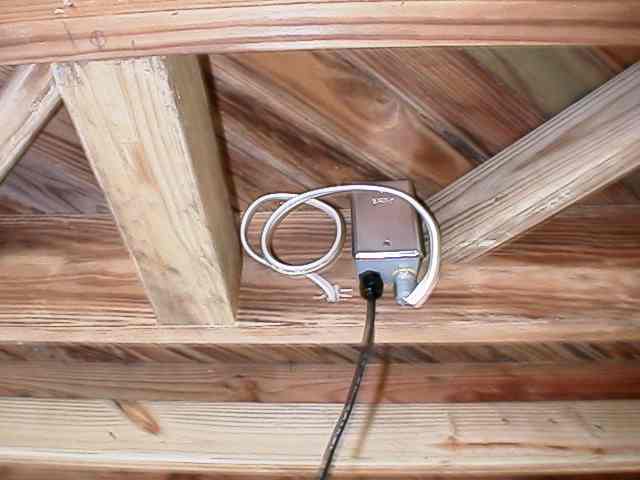 Installed junction box, ready to go |
Gutters
After installing the American dry Deck ceiling system, call the Gutter Man to install the gutters. ***The Splash Shields go inside the gutters. Tell the gutterman this and show him how the system works. Use standard gutter hangers and screw through the Splash Shield. Screws must be used with the gutter hangers. Remember, to get into the ceiling system at a later date as to install a Ceiling Fan, etc., the gutter must be able to be lowered. Use as many 3"x4" downspouts as possible to provide adequate drainage. The ceiling system catches alot of water...it is a roof!
 Use typical Gutter Hanger Use typical Gutter Hanger |
 Clip on the front lip and rotate into place Clip on the front lip and rotate into place |
 We use screws with a rubber washer We use screws with a rubber washer |
Trim it out!
A quality installation not only relies on the ceiling system to be installed correctly with the ceiling panels looking very uniform but the trimming details around the deck put the installers name on the job. Let's look at a few typical areas that professional quality installers normally finish out. Generally, there is a small overhang past the outside supporting posts where the joists are not covered with the American Dry Deck ceiling. These exposed dirty-looking joists are normally covered with perforated vinyl soffit or a decorative air channeling woodwork, standard materials in building supply stores. Supporting beams, such as mid-span girders, and supporting columns are always wrapped or covered to give the appearance of a finished look. At the ends of the deck, where the End Stringer/End Cap hang down, a top edge beveled 1x8 is used conceal the ceiling's edge. Trim out boards, perforated vinyl soffit and column covers are a must to trim it out to the finished look, the true marksmanship of a Quality job!
 Trim out using vinyl soffit Trim out using vinyl soffit |
 Make it look finished! Make it look finished! |
 The clean look! The clean look! |
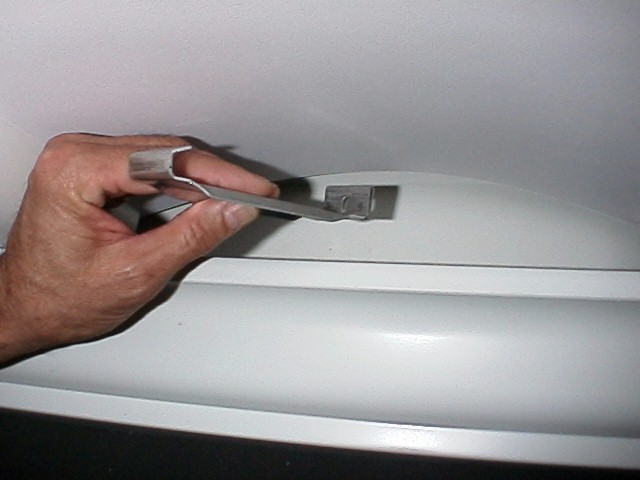
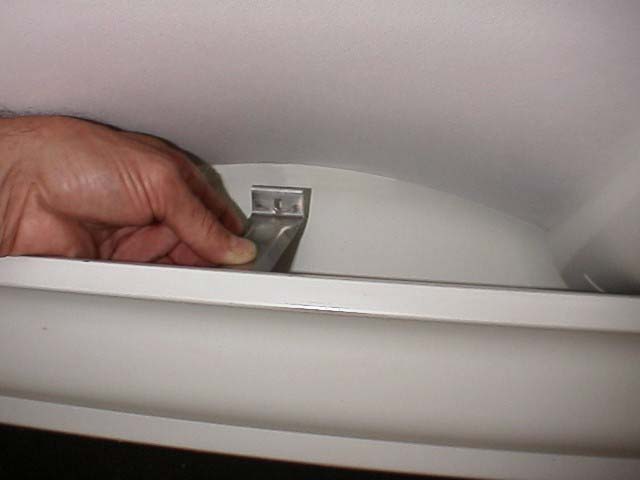
Un-Locking the Ceiling
The system is designed for access when necessary...especially if your wedding ring fell through the deck above. You may also want to add a ceiling fan or porch swing at a later date. To do this, one complete gutter must be lowered a couple of feet to insert the pry bar or as we call it the "Cap Removal Tool". Have some 2x4's available to prop the gutter up while working on the ceiling. The pry bar head must be 1" wide and inserted between the locking Cap and Stringer on either side of the arrow-head snap-lock feature. Care must be taken to work it into the tight slot. Work it into the slot and give it a pop. The Cap will pop loose and then it can then peel off to the other side of the deck. Use your fingers to grab inside the Cap to pull it down. Before re-installing the Ceiling panel, replace the old Cushion Strips on the Stringer and wipe off the dirty ceiling panel with a damp rag where it comes in contact with the Cushion Strip. The opposite side gutter does NOT need to be lowered. During re-install, slide the Cap end up over the gutter and begin installing the Cap from the side where the gutter is loweder and proceed along as usual. The last 1/2 foot or so will snap in easily.
Tools
Here are a few basic tools used by installation contractors
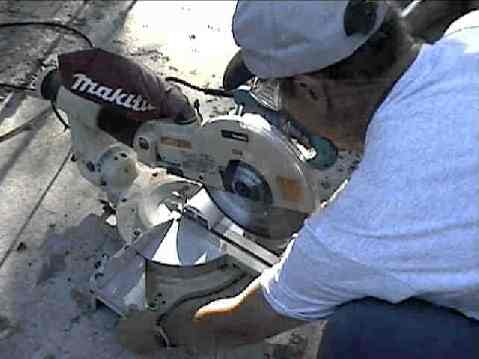 Sliding Cut-Off Saw |
 Drill |
Rubber Hammer |
 6' Carpet Straightedge |
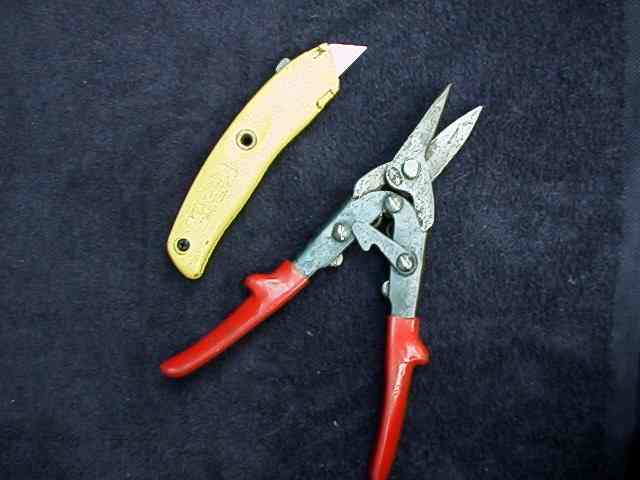 Knife & Tin Snips |
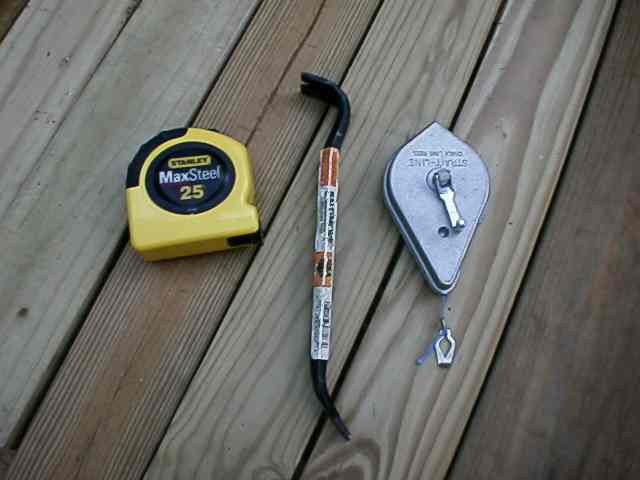 Tape, Cap Removal Pry Bar,Stringline |
A Quality Installation!
Selling to QUALITY, COMMITTED installers is our highest priority at American Dry Deck. We continually strive to maintain excellence in all areas of Customer Support, providing you with immediate answers to your technical questions while carefully listening to understand what you want to know. That is one reason our Customer Service group is thoroughly trained in the field to provide technical expertise. Everyone at American Dry Deck is required to perform installations and to understand the product, not just talk about it. Our Distributors and Dealers are an integral part of our commitment to service and excellence. They have signed up to this high level of technical support for all levels of their customers, whether a large company or an individual. As a result, you will find that the entire family of American Dry Deck personnel is here to serve you.
Tech Support
We encourage you to use our Tech Support/Customer Service Group either by email or by phone: techsupport@americandrydeck.com and our Customer Service group at customerservice@americandrydeck.com or just give us a call at 888-416-7168. Just send in your sketch, we will draw on it to show you the Dry Deck layout and send it back. We also have an engineering group at your service for special project requests. Please give us a call, our job is to help.